

Flash Deck® Nail Base - Install Protocol
Product Specifications
Product Description
Flash Deck® Nail Base is a premium mechanically attached synthetic underlayment.
Designed with an advanced woven profile, Flash Deck® Nail Base delivers exceptional tear resistance, secure walkability, and up to six months of UV exposure. The following guidelines detail the proper layout, lap requirements, and fastening techniques to ensure a reliable, watertight dry-in layer for your roofing system.
INSTALLATION INSTRUCTIONS
- Layout: Flash Deck® Nail Base should be installed with the printed surface facing up.
- Laps: Horizontal seams should be lapped 4" and vertical side seams should be lapped 12".
- Fastener Concentration: Fasteners should always be concentrated in the horizontal seams.
- Fastener Target Marks: The correct location for fasteners is clearly printed on the surface of the Flash Deck® Nail Base. For normal application, place a fastener in each of the printed "⊕"s and ignore the printed "〇"s.
- Fastener Spacing: Fasteners should be concentrated in the horizontal laps. When using standard roofing nails or large-headed cap nails, fasteners should be spaced every 12 inches in the seams and staggered every 24 inches along two rows in the field of the underlayment.
- Preferred Fasteners: Standard roofing nails with a 3/8" head provide the best protection against water infiltration and are our preferred fastener for most Flash Deck® Nail Base applications. 1” cap nails may be used when required by local code or if unusually high winds are forecast, but they are typically unnecessary.
- UV Exposure: Flash Deck® Nail Base may be left exposed to the elements for up to 6 months when properly secured using regular roofing nails or cap nails.
- Extreme Weather Application: For extended periods of exposure or anticipated extreme weather conditions, double the fastening strength by placing nails in both the "⊕"s and the "〇"s printed on the underlayment.
- Staple Application (Short-Term Only): Staples are commonly used to install asphalt-saturated felt and will perform just as well with this product. Staples should only be used if the primary roofing material will be installed the same day and permitted by local code.
- Stapling Technique: When utilizing staples, a continuous line should be placed along the seams with only a few staples placed in the field. The superior tear strength of Flash Deck® Nail Base allows it to be installed using far fewer staples than traditional organic felt.
PROPER PLACEMENT OF DRIP EDGE
-
Eave Edge (Bottom): Flash Deck® Nail Base is installed over the drip edge at the eaves to facilitate water shedding.

Standard Installation – Nail Base over Drip Edge at Eave
-
Rake Edge (Sides): Flash Deck® Nail Base is installed under the drip edge at the rakes to facilitate water shedding.
Superior Installation – Nail Base under Drip Edge at Rake
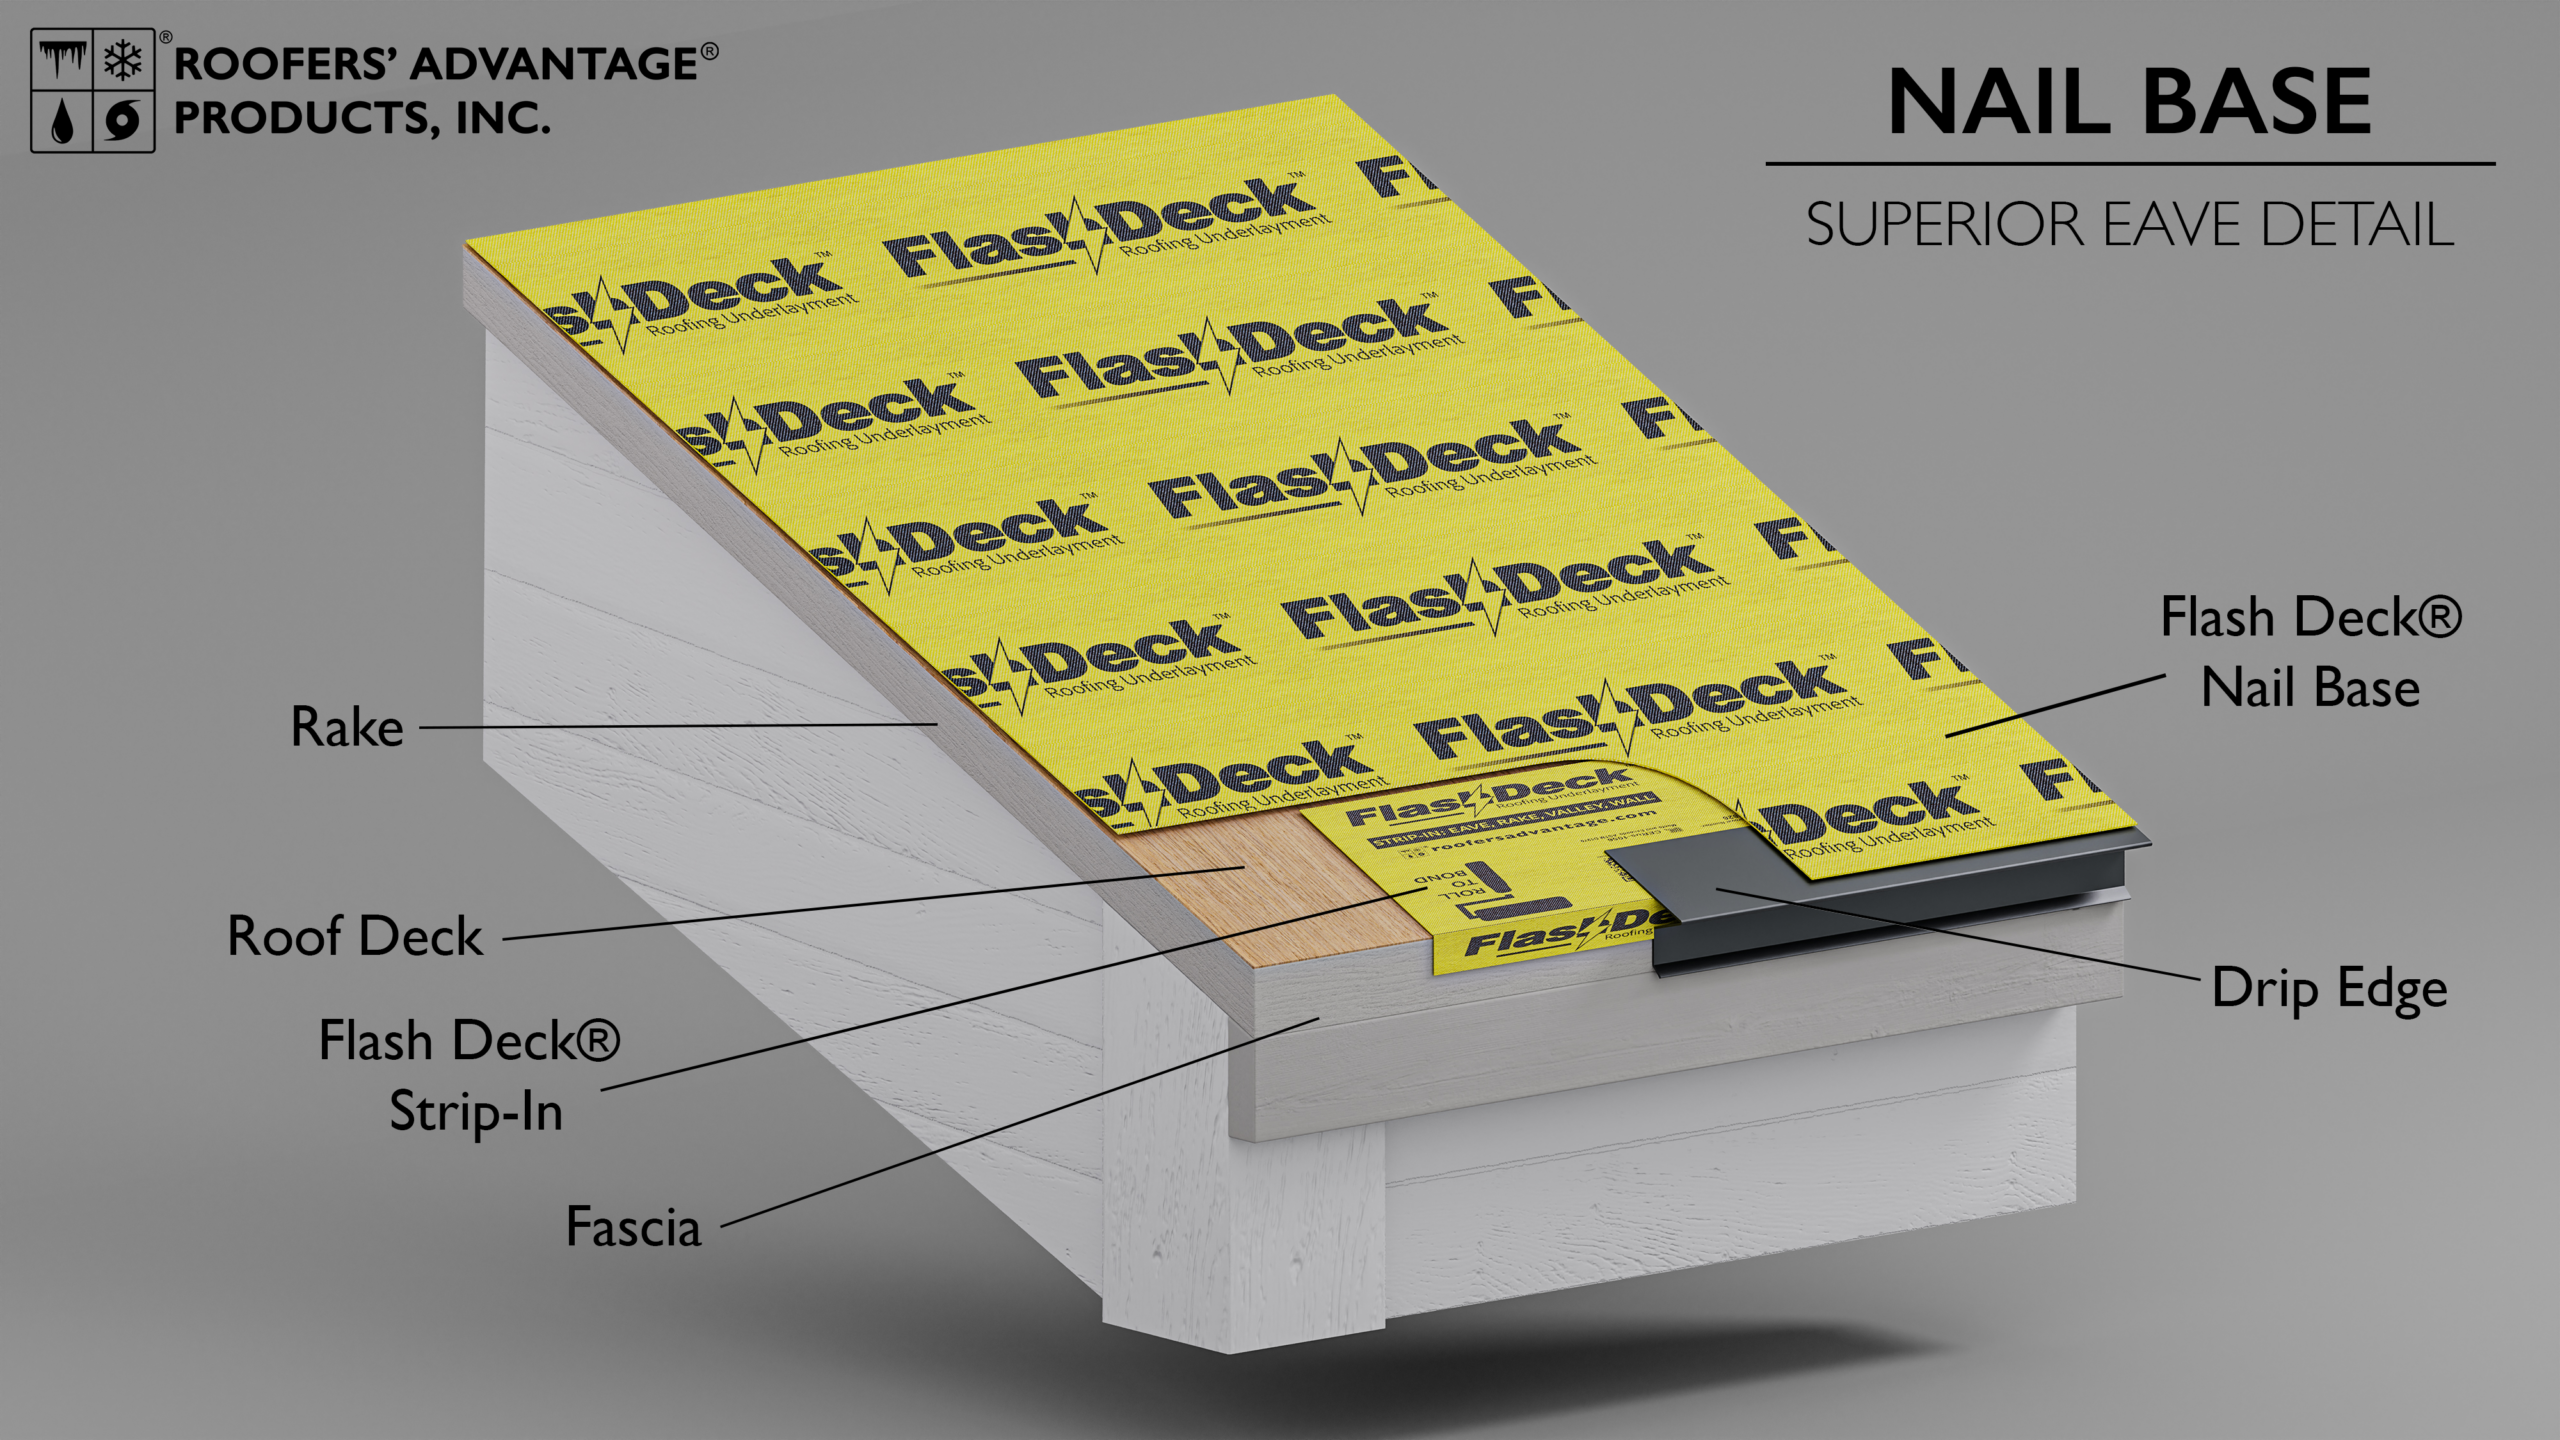
ENHANCED EAVE PROTECTION
If local building codes permit and you are installing Flash Deck® Nail Base without a self-adhered product, such as Flash Deck® Metal Base or Flash Deck® Shingle Base, it is strongly recommended to install Flash Deck® Strip-In on the fascia and deck prior to installing the drip edge. This practice provides a critical deck seal and essential additional weather protection.
Code Compliance & Self-Adhered Underlayment
Consult local building codes regarding the requirement for self-adhered underlayment. In many jurisdictions, a self-adhered membrane is required at the eaves, rakes, and valleys in place of or in addition to mechanically attached underlayment to protect against ice damming and hydrostatic pressure. Ensure Flash Deck® Nail Base is lapped correctly over any code-required self-adhered membranes.